Nginx 实战

查看 Nginx 命令

查看安装目录

whereis nginx

nginx: /usr/bin/nginx

查看 nginx 进程

ps -ef | grep nginx

查看 nginx 可执行文件

ps -ef | grep nginx

/www/server/nginx/conf/nginx.conf 表示配置文件

或者也可以通过 nginx -t 来查看配置文件在哪,虽然这个命令是检测 nginx 配置文件是否有语法错误:

1
2
nginx: the configuration file /www/server/nginx/conf/nginx.conf syntax is ok
nginx: configuration file /www/server/nginx/conf/nginx.conf test is successful

配置文件

nginx.conf

全局模块

worker_processes auto; // 进程数量
error_log /www/wwwlogs/nginx_error.log crit; // 错误日志存放路径
pid /www/server/nginx/logs/nginx.pid; // 存放 pid 文件

events

worker_connections 51200; // 单个进程最大的连接数(最大连接数:连接数+进程数)

http 块

  • include 引入其他的配置文件
  • default_type 文件类型

解决跨域问题

首先启动 nginx 服务,输入命令 nginx,修改根路径下的 index.html 文件

1
2
3
4
5
6
7
8
9
10
11
12
13
14
15
16
17
18
19
20
21
22
23
24
25
26
// nginx 配置,访问 localhost:8080/ 时,会打开 index.html
location / {
root html;
index index.html index.htm;
}

// 修改index.html
<body>
<h1>Welcome to nginx!</h1>
<button id="btn">send</button>

<script>
btn.onclick = () => {
const xhr = new XMLHttpRequest()
xhr.open('GET', 'http://localhost:9999/list')

xhr.onreadystatechange = () => {
if (xhr.readyState == 4 && xhr.status == 200) {
console.log('返回结果', xhr.responseText)
}
}

xhr.send(null)
}
</script>
</body>

起一个本地 node 服务 9999

1
2
3
4
5
6
7
8
9
10
11
12
const express = require('express');
const app = express()

app.get('/list', (req, res) => {
res.json({
code: 0,
msg: "hello server"
})

app.listen(9999, () => {
console.log('server site an port 9999 ...')
})

当我们点击发送按钮时,会出现跨域问题,这是因为浏览器 同源策略限制,协议、域名、端口号不同,会形成跨域。

这里是端口不同。

我们可以利用 nginx 来解决。

打开 nginx.conf,新增一条转发规则,表示遇到 api 开头的,都将转发到某个服务下

比如 xhr.open('GET', '/api/list'), 会将 api 替换成 http://localhost:9999/

1
2
3
4
5
// 添加

location /api/ {
proxy_pass http://localhost:9999/;
}

修改调用接口的地方:

1
xhr.open('GET', '/api/list')

此时,再次点击 发送,不会再出现跨域了。

Vue Router History 模式 404 问题

Vue 项目,采用 history 的路由模式,打包后放到 nginx 上部署,切换路由时出现 404 现象。

解决方案:try_files $uri $uri/ /index.html;

1
2
3
4
5
6

location / {
root html;
index index.html index.htm;
try_files $uri $uri/ /index.html;
}

负载均衡

我们可以建 3 个(或者更多)node 服务来模拟实现,可以通过 count 计数,来查看每个服务被分配到的请求数

  1. server1
1
2
3
4
5
6
7
8
9
10
11
12
13
14
15
16
17
18
19
20
const express = require('express');

const app = express()

let count = 1

app.get('/list', (req, res) => {
res.json({
code: 0,
msg: "hello server 9999"
})

console.log(`server 9999 ------ ${count}`)
count++
})

app.listen(9999, () => {
console.log('server site an port 9999 ...')
})

通过 pm2 log 查看日志

1
2
3
4
5
6
7
// package.json

"start": "pm2 start index.js index2.js index3.js --watch",
"stop": "pm2 stop index.js",
"allList": "pm2 list",
"monit": "pm2 monit",
"log": "pm2 log"
  1. server2、server3 只是端口不一样

修改 nginx 配置

配置根路径,代理到本地服务,当我们启动 nginx,访问 http://localhost:8080/ 时,服务会代理到我们配置的 upstream node 服务上,访问 http://localhost:8080/list 即可调用咱们写好的 node 接口。

1
2
3
4
5
6
7
8
9
10
11
upstream node {
server 127.0.0.1:9997;
server 127.0.0.1:9998;
server 127.0.0.1:9999;
}

server {
location / {
proxy_pass http://node; // node 是 upstream 指定的 name
}
}

最后我们可以通过 postman 或 apifox 来进行压测了。

1
接口:http://localhost:8080/list


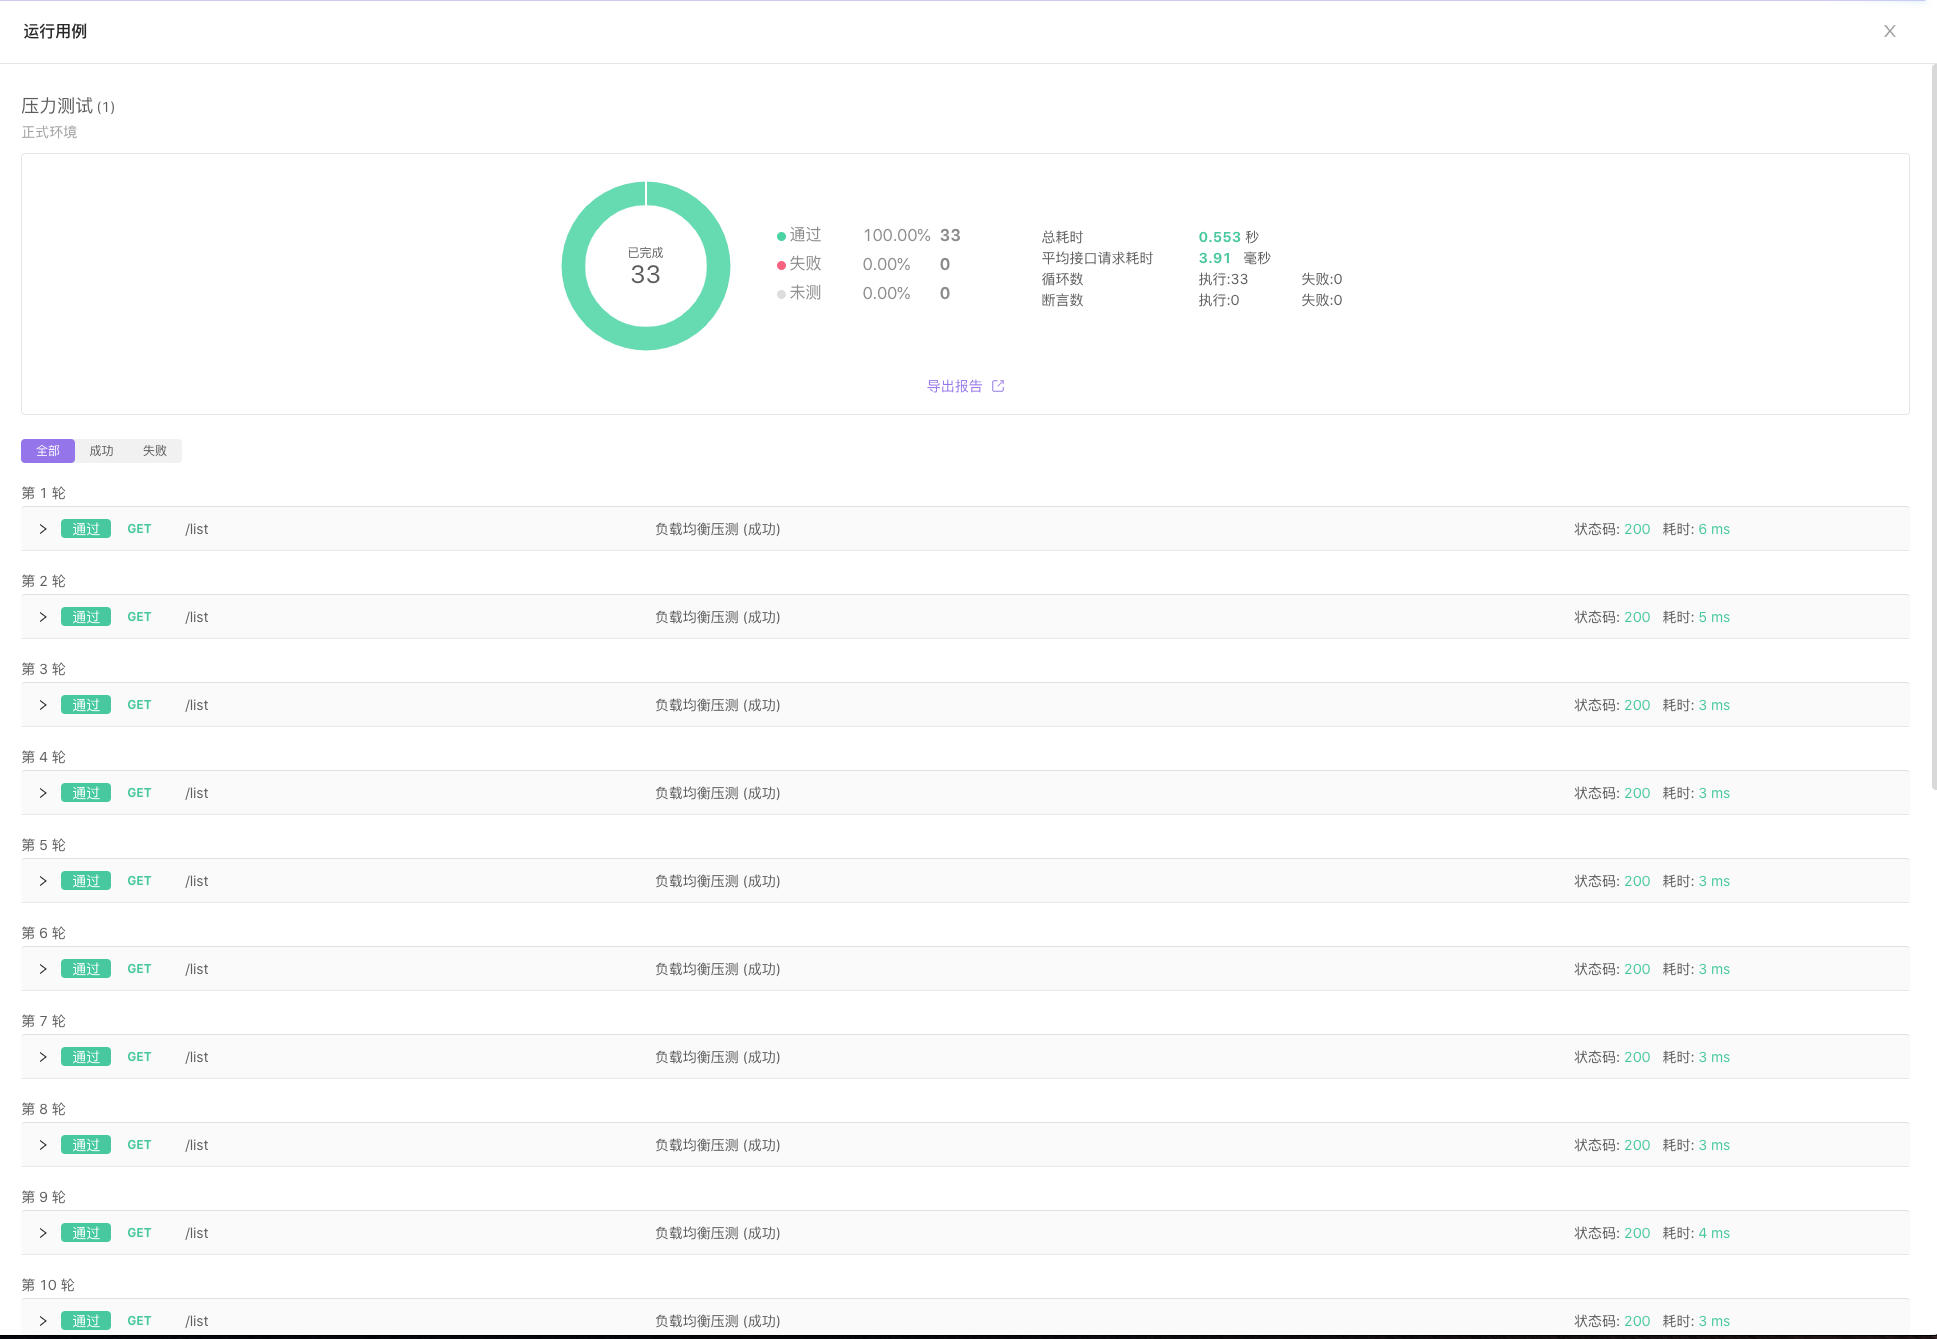
这里设置的接口循环次数33,意味着我们将要调用 33 次接口,运行之后,33次均可以成功跑通。

来看下结果:
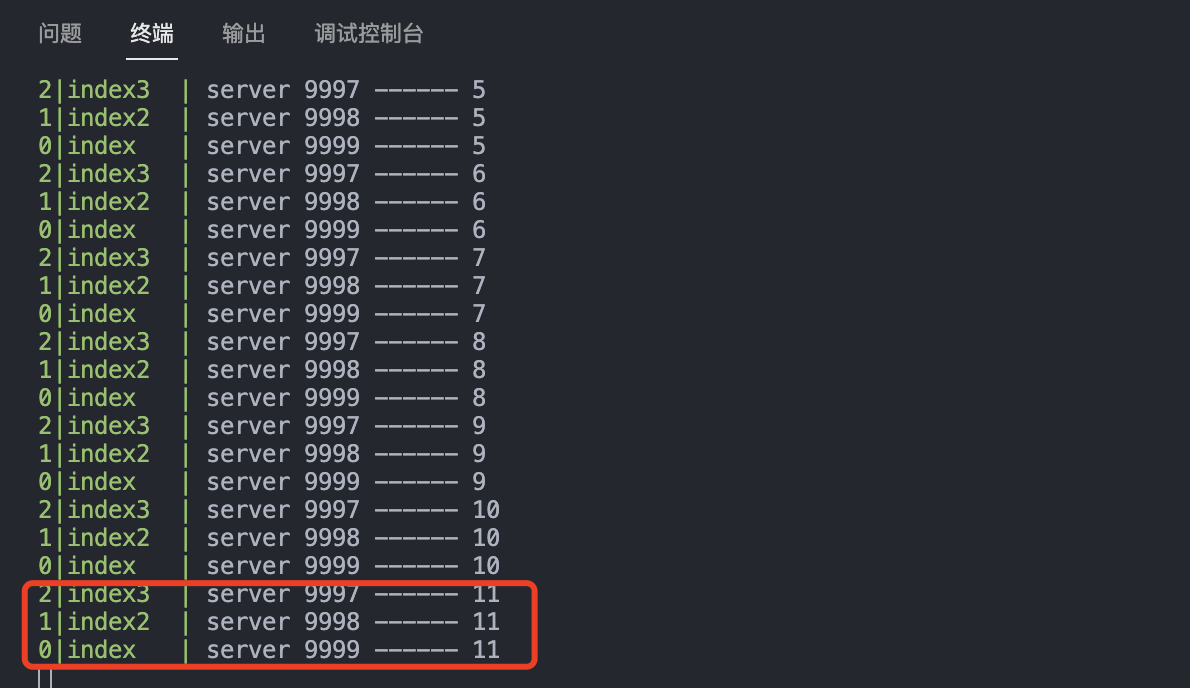
每个 server 分配均匀,33次,每个服务分配了 11 次请求。

权重

还可以给服务设置权重 weight,数值越大,权重越高,请求数越多。

1
2
3
server 127.0.0.1:9997 weight=3;
server 127.0.0.1:9998 weight=2;
server 127.0.0.1:9999 weight=1;

修改完配置后,重启 nginx nginx -s reload,继续运行 apifox 压测接口:
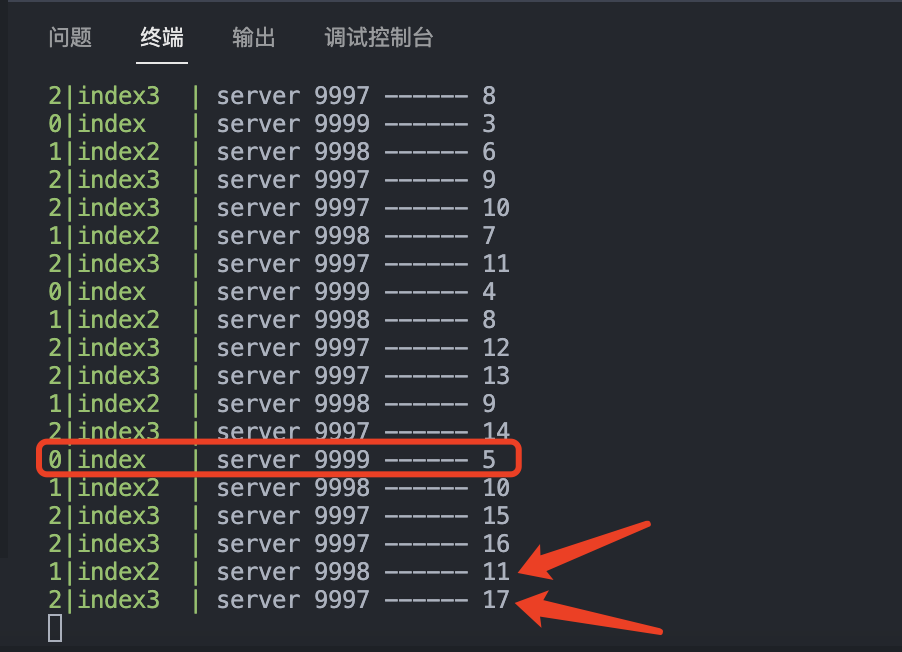
权重最高的 9997 请求被分配了 17 次,权重最低的 9999 只分配了 5 次请求。

超时

设置超时备用模式,如果存在超时,就会选用备用的服务 9003,如果不存在超时请求,则不会有请求打到 9999 服务上。

1
2
3
4
5
upstream node {
server 127.0.0.1:9997 fail_timeout=60;
server 127.0.0.1:9998 fail_timeout=20;
server 127.0.0.1:9999 backup;
}

参考资料


本博客所有文章除特别声明外,均采用 CC BY-SA 4.0 协议 ,转载请注明出处!